To get started, click on Administration from the top navigation bar.

Client users with an Administrator role can invite additional users to Crunchafi Lease Accounting. From the Administration > Users page, click the Invite button in the top-right corner.

Enter the user's email address, first name, and last name, and choose the relevant role. Click Save.
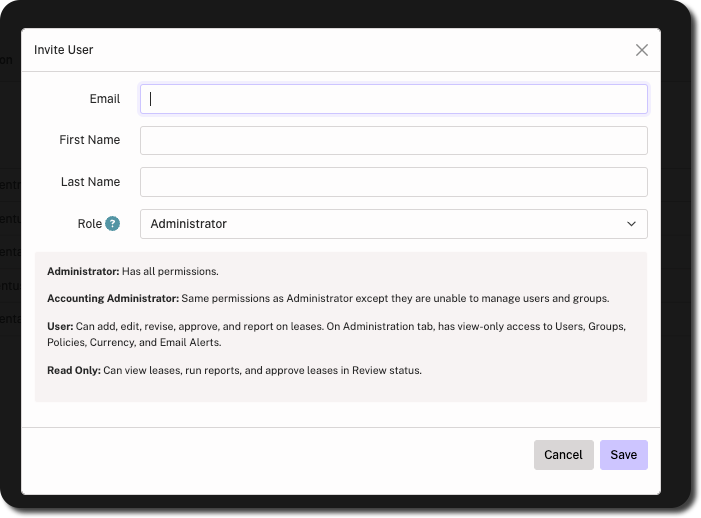
The user will receive an invitation email with instructions on how to set up their account.
Groups are used to send email notifications for important lease activity. For example, you can set up email alerts to notify a group of users when leases under a specific Reporting Entity are reaching their End Date.
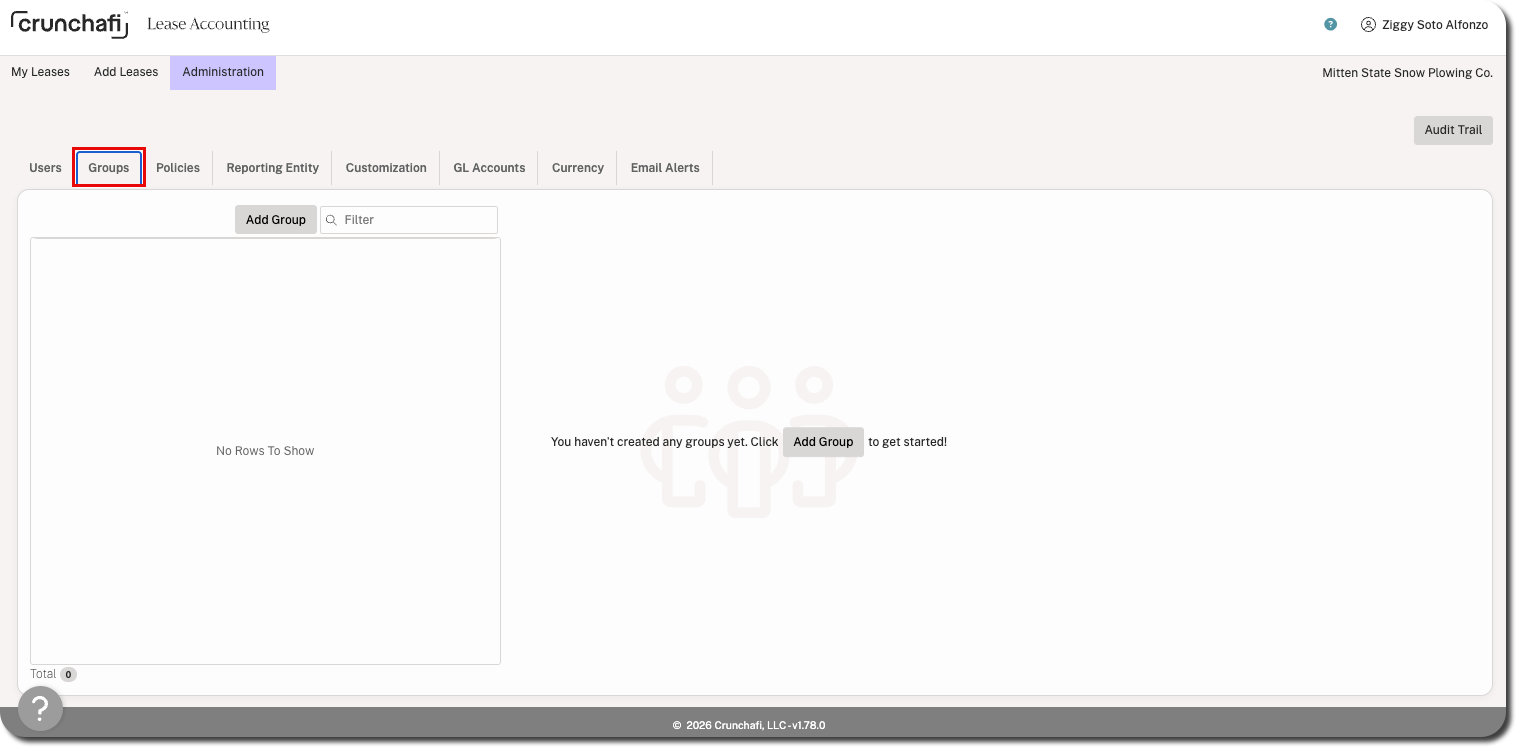
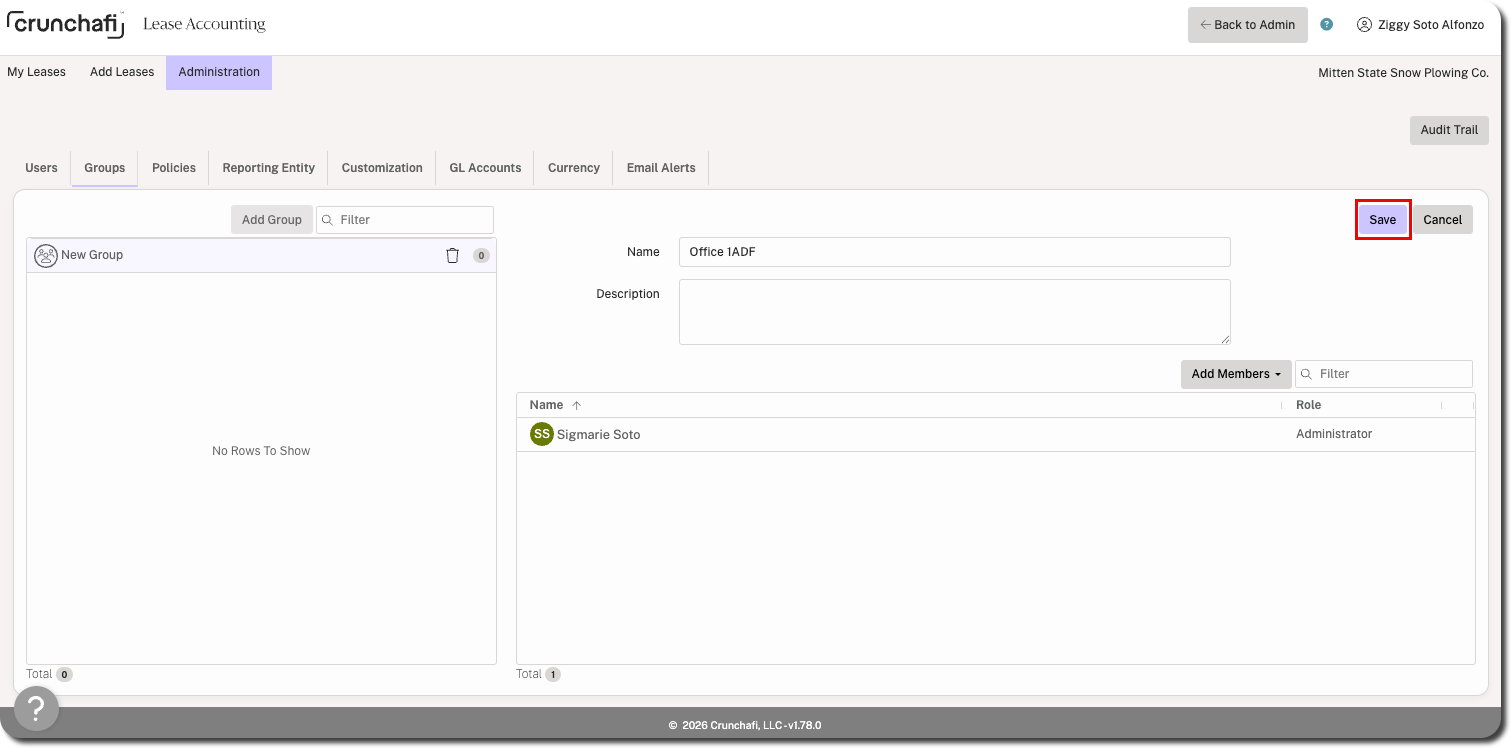
From the Groups tab, click the Add Group button. Enter a name (required) and description (optional). Click the Add Members dropdown to select one or more users and then click Save.
To skip to instructions for email alerts, click here.
The Policies tab is separated into two sections:
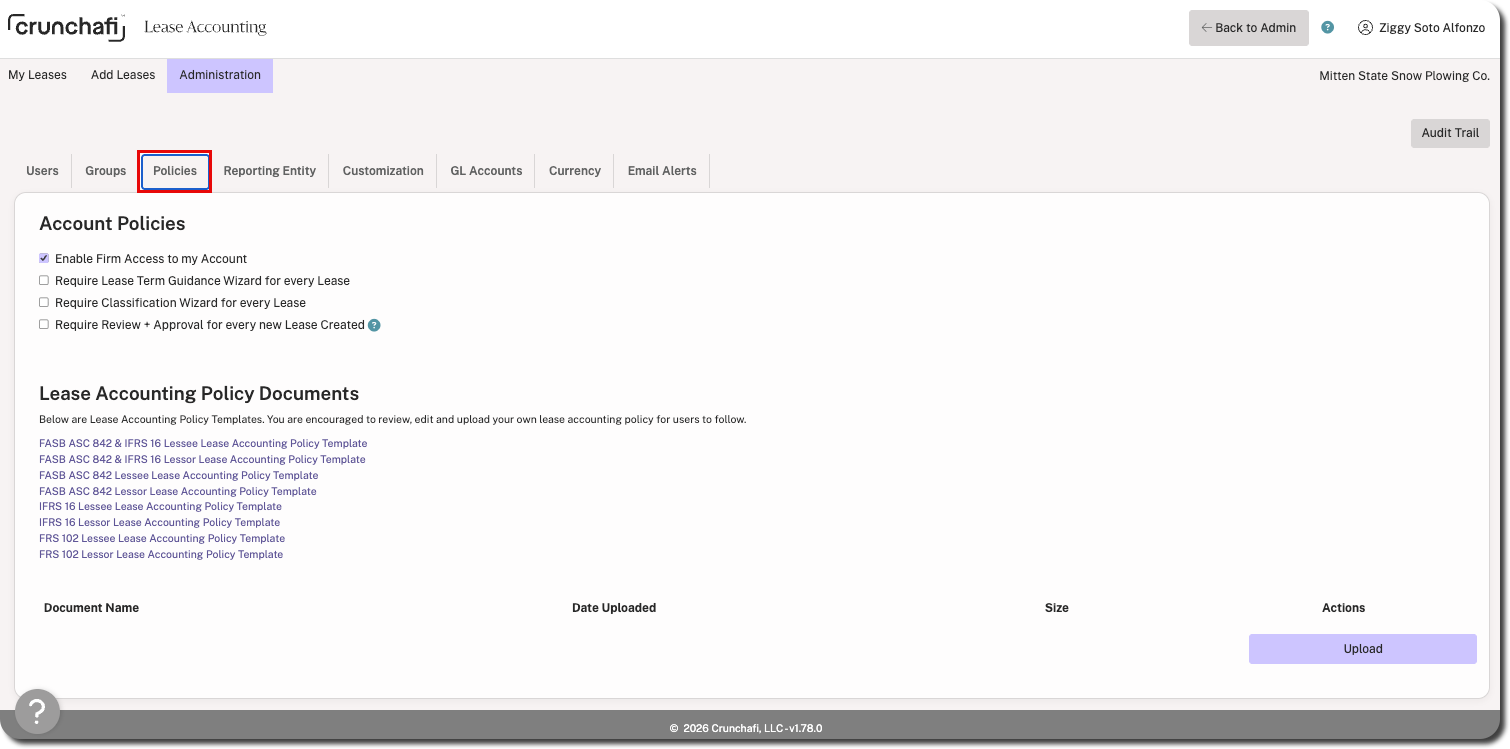
Review and select/de-select options as needed for your organisation:
Click on the FRS 102 Lessee or FRS 102 Lessor policy template to download it, open it on your computer, and make/save the necessary elections. Click Upload under the Actions column to store the policy document in Crunchafi.
To start adding leases under FRS 102, you must add at least one Reporting Entity under this accounting standard per the instructions below.
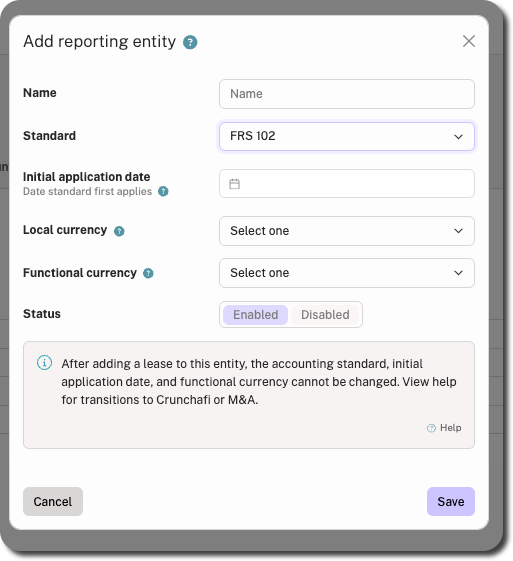
After a lease is associated with this Reporting Entity, the Accounting Standard, Initial Application Date, and Functional Currency cannot be changed.
Click the edit icon under the Actions column for the relevant Reporting Entity, select the Disabled status, and then click Save.
To associate one or more locations with a Reporting Entity, click on the row from the list and then click + Add Location in the bottom-right corner. Enter the details and click Add.
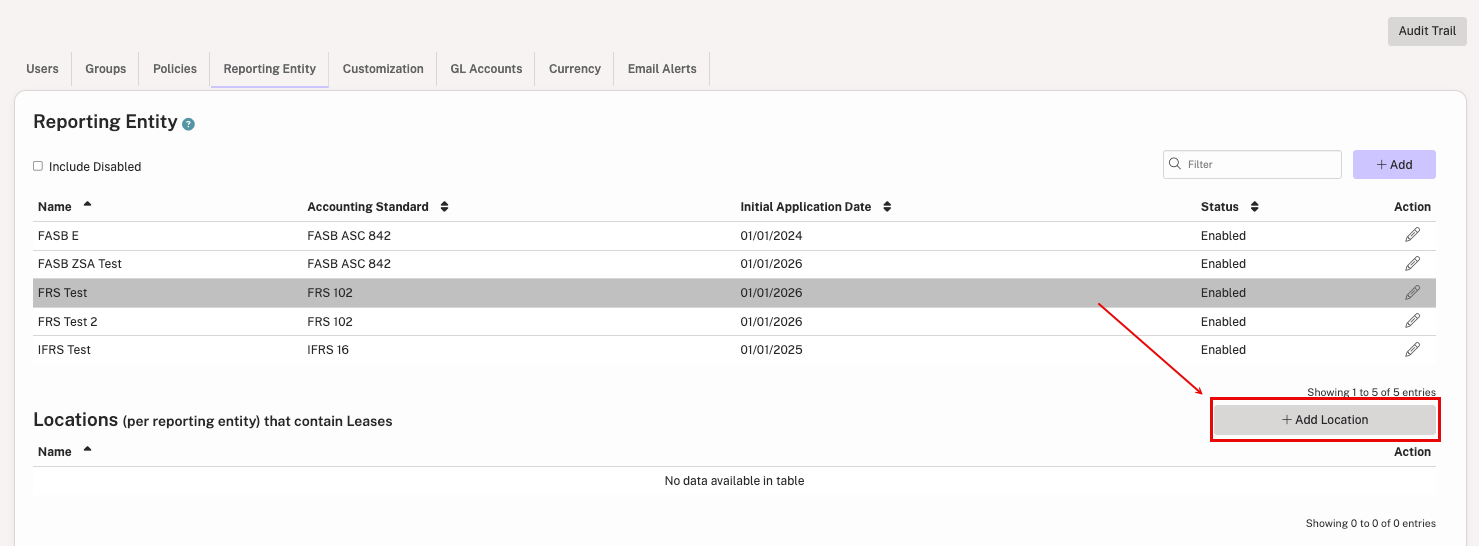
When creating a lease, you can assign a location based on the selected Reporting Entity.
Use this tab to capture values and other pieces of data that are important for your leases. This includes expanding the default list of asset types or creating custom fields. Click the + Add button to the right of the field type, enter the value, and then click Save.
Certain user roles can also add new Asset Types, Lessors, and Custom Fields by using the Add button available when creating a new lease.
From Administration > GL Accounts, update and add the lease-related GL Descriptions and GL Account Numbers to match the selected Reporting Entity's chart of accounts. This allows journal entries to map directly into the accounting system. Use the toggles at the top of the tab to switch between Lessee and Lessor if needed.
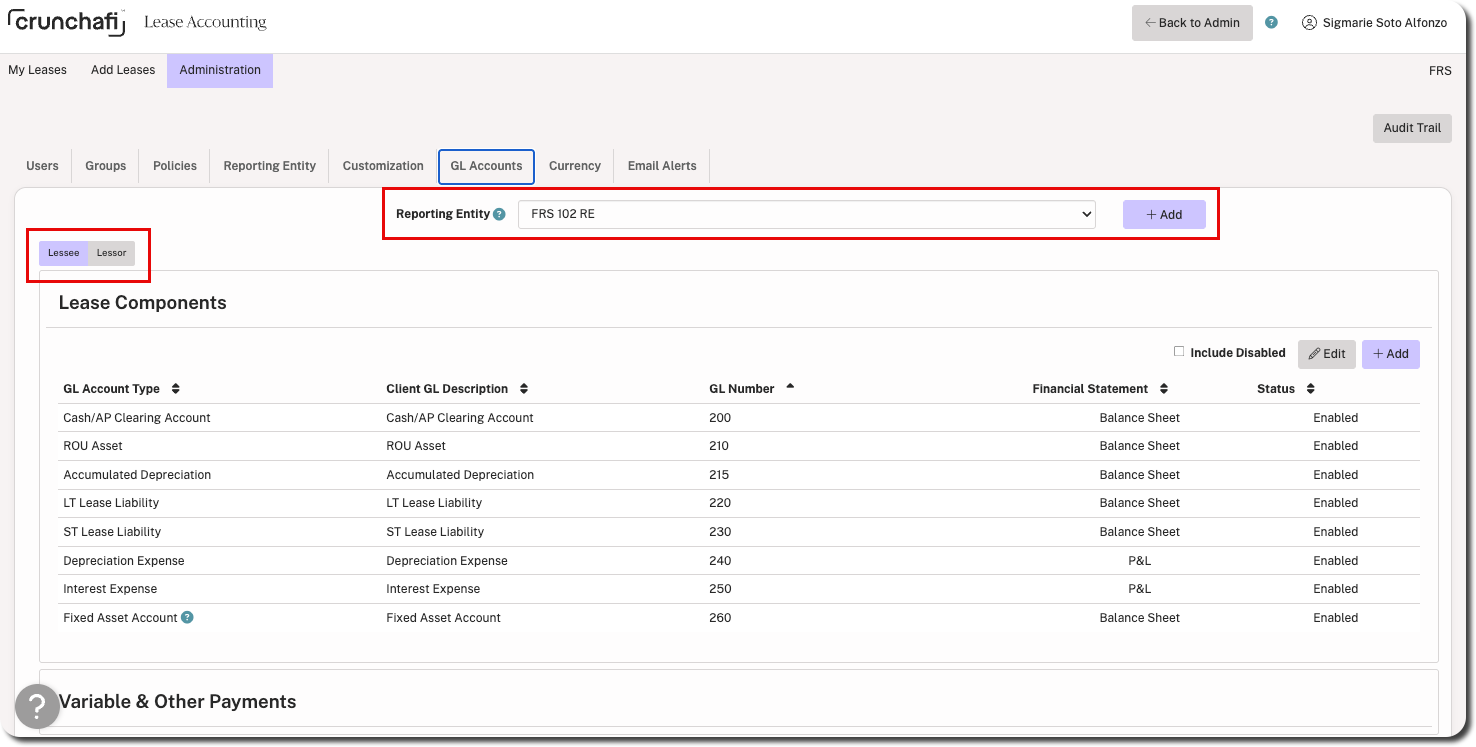
If there is more than one Reporting Entity, select a different entity from the dropdown menu to make any changes. To create an additional Reporting Entity, click +Add to the right of the dropdown menu.
GL Accounts can be disabled or edited at any time. To disable a GL Account, click Edit above the table, choose the Disabled status, and then click Save.

Additional Considerations:
This does not apply to organisations operating under a single currency.
Email Alerts are used to notify you and your team about important activities related to your leases. This eliminates the need to set manual reminders or repeatedly refer to lease details.
If you need to notify the same users for different types of leases, consider creating groups. Click here for instructions.
To add an alert, go to Administration > Email Alerts and click +Add in the top-right corner.
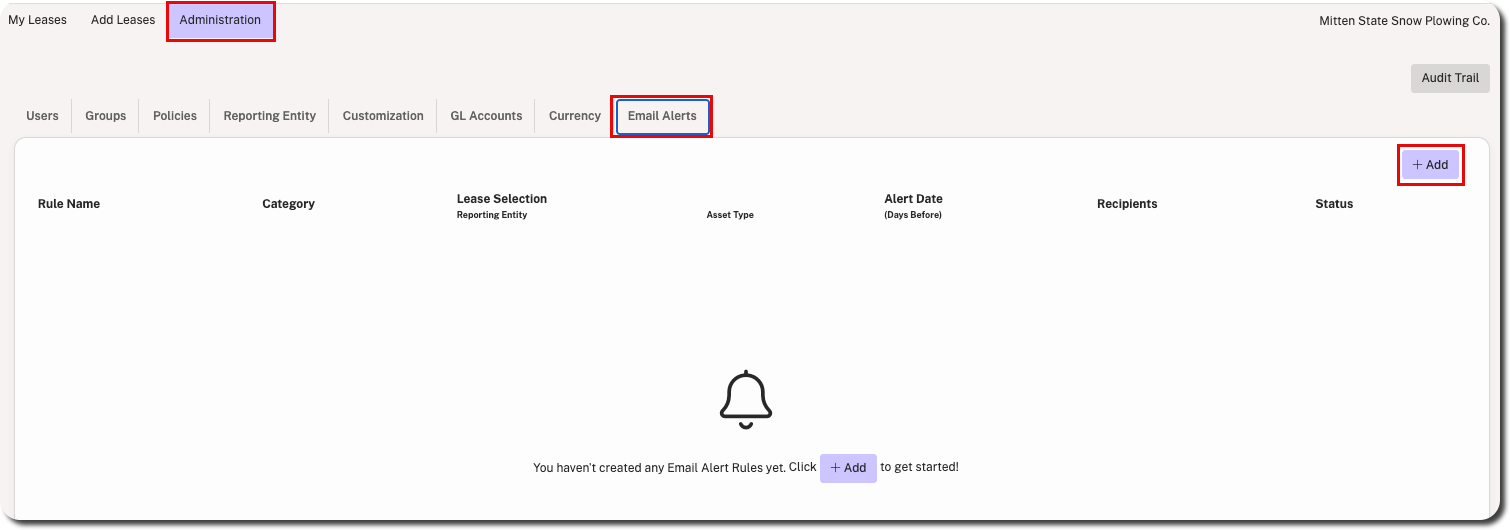
Do the following from the Add Alert Rule window:
Click Save and then click Test to send a sample email alert to yourself.
Ensure that events@crunchafi.com is on the safe sender list for your organisation to avoid notifications landing in users' spam folders.