
These settings are available for users with the Administrator role only.
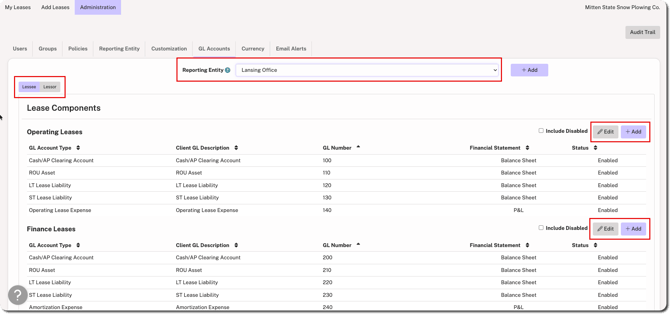
From Administration > GL Accounts, update and add the lease-related GL Descriptions and GL Account Numbers to match the selected Reporting Entity's chart of accounts. This allows journal entries to map directly into the accounting system. Use the toggles at the top of the tab to switch between Lessee or Lessor if needed.
Select the relevant Reporting Entity from the dropdown. If the Reporting Entity has not yet been added, click +Add to the right of the dropdown menu to add a new one.
To add a new GL Account Type and Description for a specific Lease Components category, click the Add button located at the far right.
Disabling or Editing GL Accounts
GL Accounts can be disabled or edited at any time. To disable a GL Account, click Edit above the table for that Lease Components category (e.g., Operating Leases, Finance Leases, etc.), choose the Disabled status, and then click Save.

Additional Considerations:
-
Disabled GL Accounts will remain attached to existing leases; financial reporting capabilities for these leases will not be impacted.
- At lease one GL Account in each Account Type must remain active.
- Disabled GL Accounts will no longer be available when adding new leases moving forward.