
A Reporting Entity is the entity for which financial statements are produced. To start adding leases under IFRS 16, a user with the Administrator or Accounting Administrator roles must add at least one Reporting Entity under this standard per the instructions below.
1. Go to Administration > Reporting Entity and click the +Add button.

2. Enter the entity name and select IFRS 16 from the Standard dropdown (if applicable).
3. Select options for the following fields:
- Initial Application Date: For leases under IFRS 16, this refers to fiscal years beginning on or after December 15, 2018. View Crunchafi's guidance on Initial Application Date for additional details on how to choose a date in line with your specific scenario. Most organizations that started using Crunchafi Lease Accounting after 2019 will have an Initial Application Date that is the first of the current fiscal year.
- Local Currency: Choose the currency used to pay lease obligations.
- Functional Currency: Defaults to the selected Local Currency but can be changed if it is different (e.g., if the currency of its parent/holding company is different).
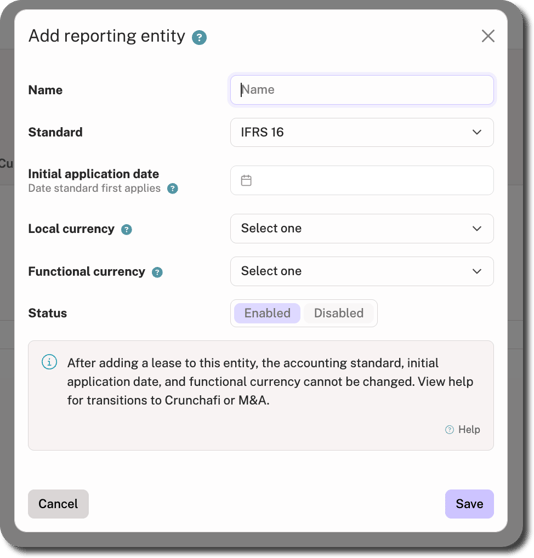
4. Click Save in the bottom-right corner.
After a lease is associated with this Reporting Entity, the Accounting Standard, Initial Application Date, and Functional Currency cannot be changed.
Adding Locations to a Reporting Entity
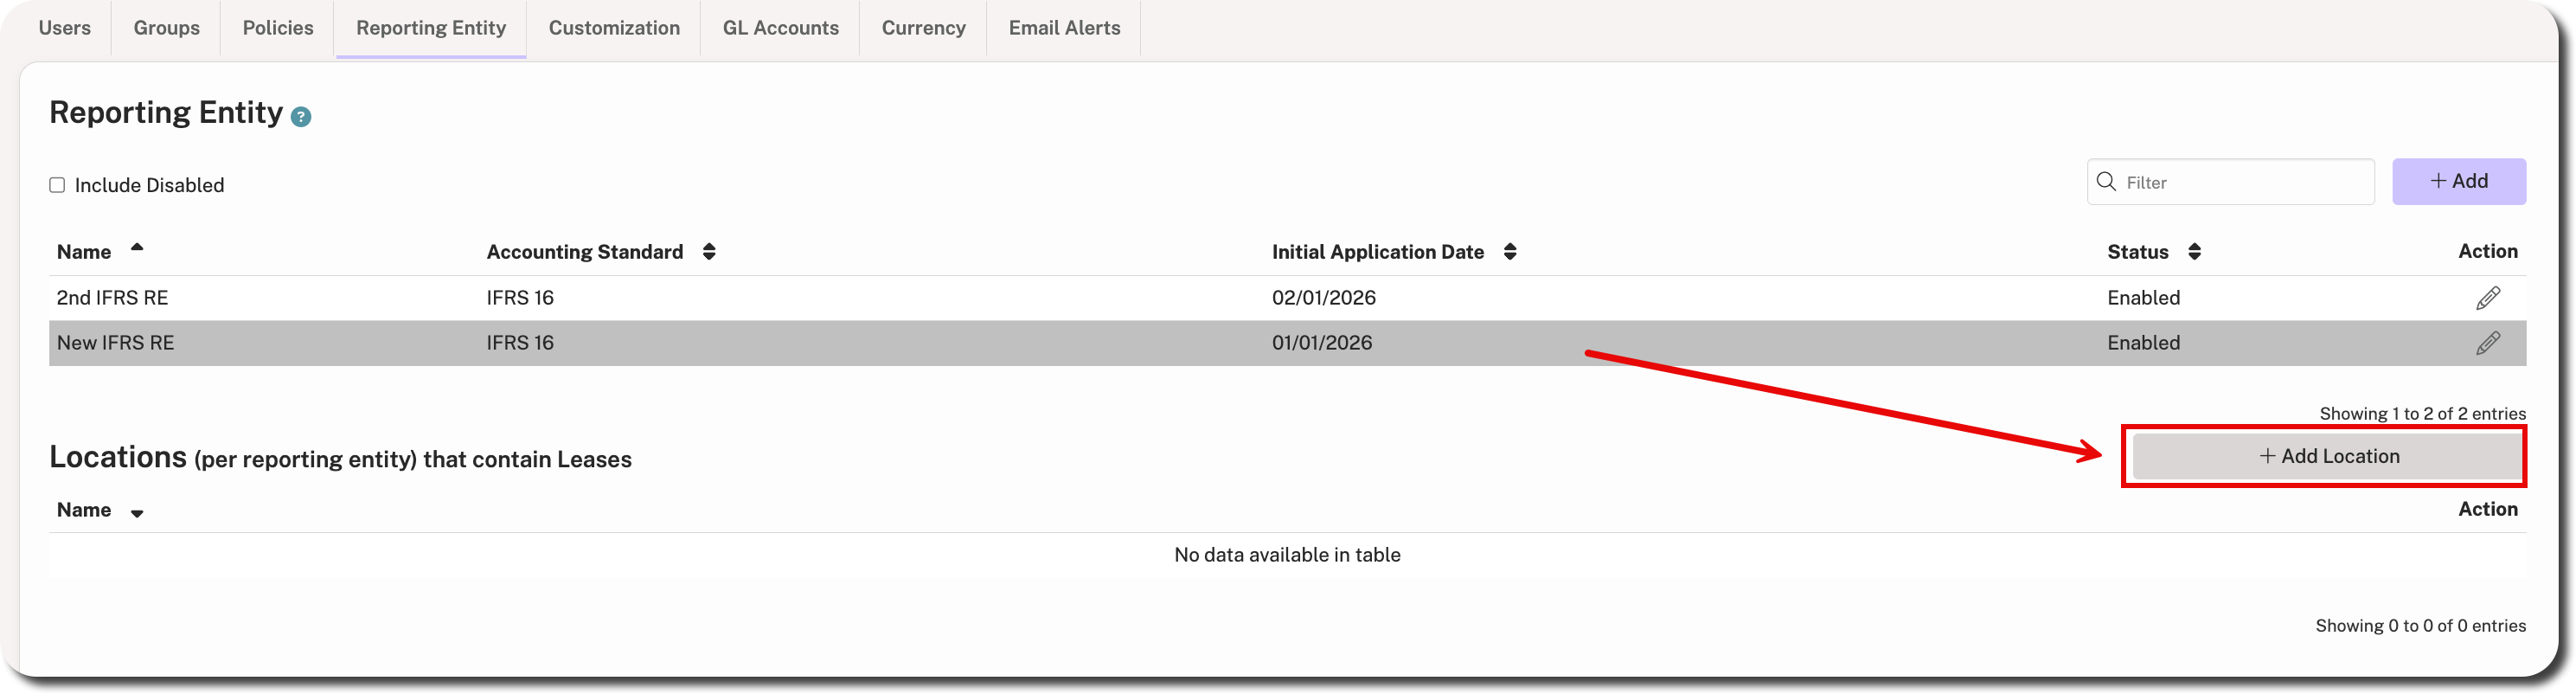
To associate one or more locations with a Reporting Entity, click on the Reporting Entity row from the list and then click +Add Location in the bottom0right corner. Enter the details and click Add.
Locations are Reporting Entity specific.
Disabling a Reporting Entity
Click the edit icon under the Actions column for the relevant Reporting Entity, select the Disabled status, and then click Save.