
View our walk-through or follow the step-by-step instructions below for any leases needing an edit, modification, or remeasurement.
TOURIAL_EMBED_HERE
1. On the My Leases page, click on the ⋮ (more) menu to the left of the lease name.
2. Select Edit from the menu.
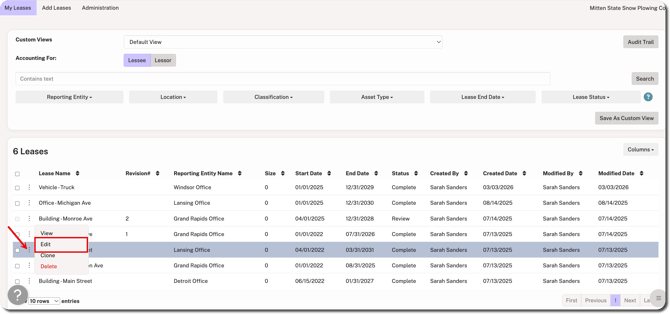
3. Select the type of edit, modification, remeasurement, or other revision you need to make to the lease.
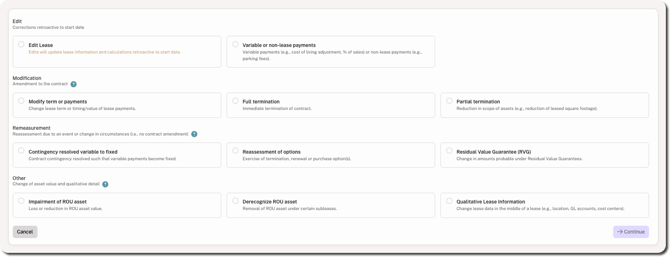
Edits vs. Revisions
Lease edits apply to the entire life of the lease (past and future). This means saved edits overwrite previous details and calculations. This is commonly used to correct any errors made during lease entry or to add more details to the lease.
Lease revision refers to a change to the lease contract that requires modification and/or remeasurement per the relevant standard. This allows the user to modify the lease while preserving a log of the previous details and calculations.
For more details about edits vs. revisions in Crunchafi Lease Accounting, click here. Alternatively, you can click on the question mark icons icons located next to the section headings on the edit/revision menu for further guidance.
4. Click Continue in the bottom-right corner.
Lease Edits
Selecting one of the edit options (i.e., Edit Lease or Variable or non-lease payments) initiates an edit that will overwrite previous details.
Once selected, you can go to the relevant tabs in the lease to update the information, such as adding a description, selecting a location or lessor, or attaching a file. Any changes that affect calculations, such as terms or payments, are retroactive to the start of the lease.
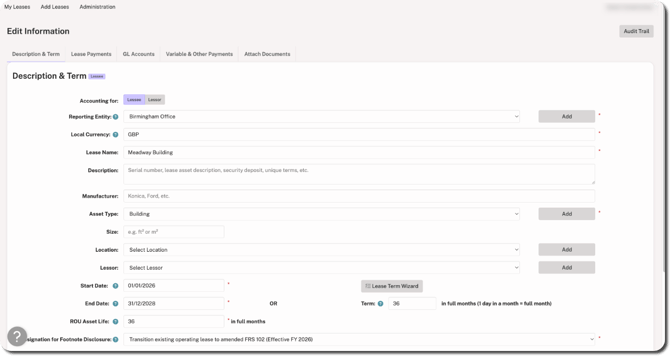
Click Save Changes. You can access the updated lease from the My Leases page. Since an edit overwrites previous details, a revision number is not recorded for the updated lease.
Lease Revisions
Selecting any options under the Modification, Remeasurement, or Other sections initiates a revision and the original details/values will be preserved for reference.
Enter the revision date (i.e., the date on which the lessee and lessor agreed to the contractual change). Selecting a revision date auto-populates the date on which the previous lease version will be frozen. For more information about selecting a revision date, click here.
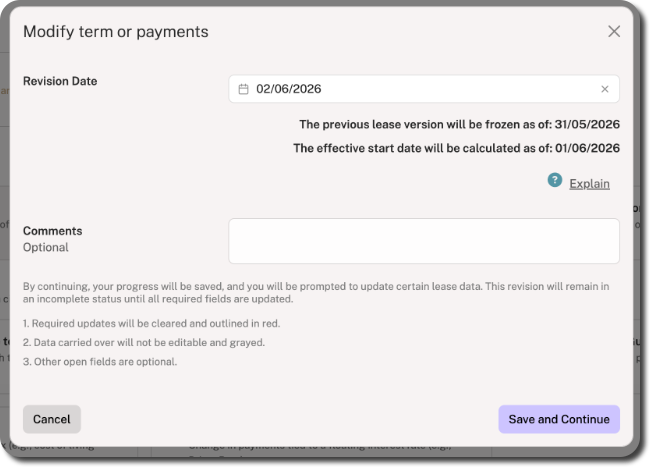
Provide any additional comments about the change (optional) and then click Save and Continue.
Make the relevant changes to the tabs outlined in red. You can use the revision toggle above the tabs to switch between versions for comparison. While making your changes, the information below is required. Make sure to click Save Changes from the bottom-right corner of each tab before moving onto the next one.
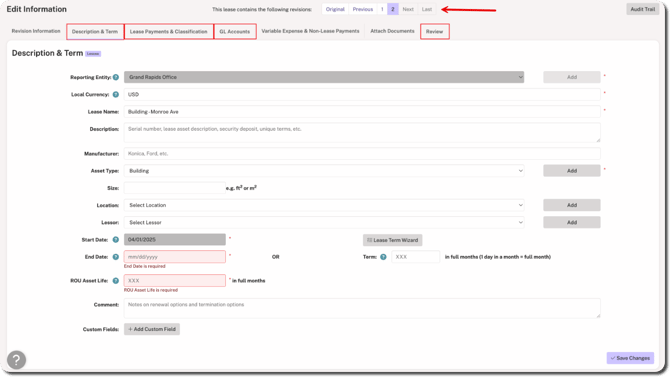
- Description & Term: Enter a new end date.
- Lease Payments & Classification: Enter the discount rate, add payment streams, and use the Classification Wizard to classify the revised lease.
- GL Accounts: Update the GL Accounts for revisions.
- Review: If the Review + Approval policy is enabled, you must submit the revised lease for review by another user from your organization.
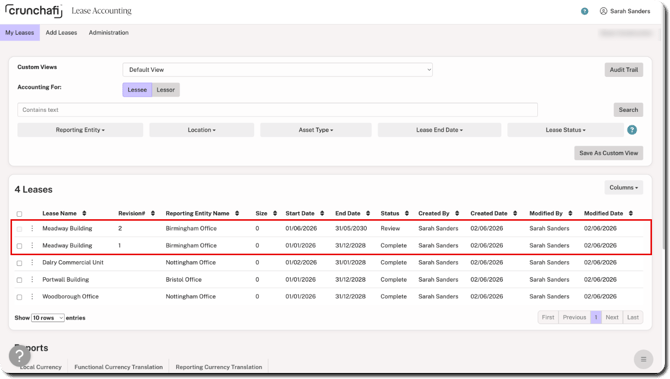
Once saved/submitted, two versions of the lease appear on the My Leases page. Check under the Revision# column for the previous and latest versions.
NOTE
Both versions must be selected to run the journal entry report on the revisions.