
Requirements
- Access to QuickBooks Desktop 2013 or newer of any subscription (e.g., Enterprise, Premier, Pro, Accounting, etc.).
- The target client has provided you with a copy of their QuickBooks Desktop company file. Any file type is acceptable as long as you can open it in your version of QuickBooks.
- The password for the admin account is required to approve the Data Extraction connection.
Data Collection & Direct Connection
1. Start a new data collection from the workspace.
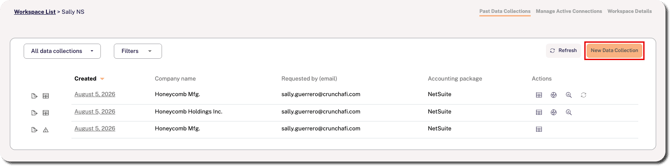
2. Select Connect to accounting system and click Next.
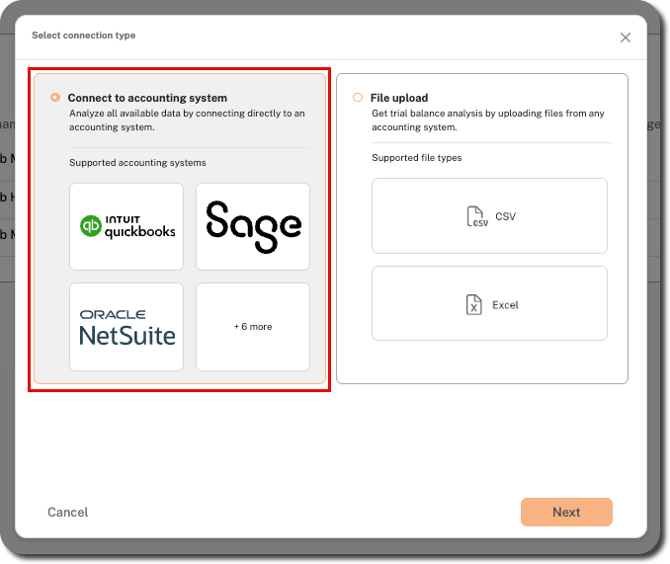
3. Choose Connect directly on the right as the connection method and click Next.
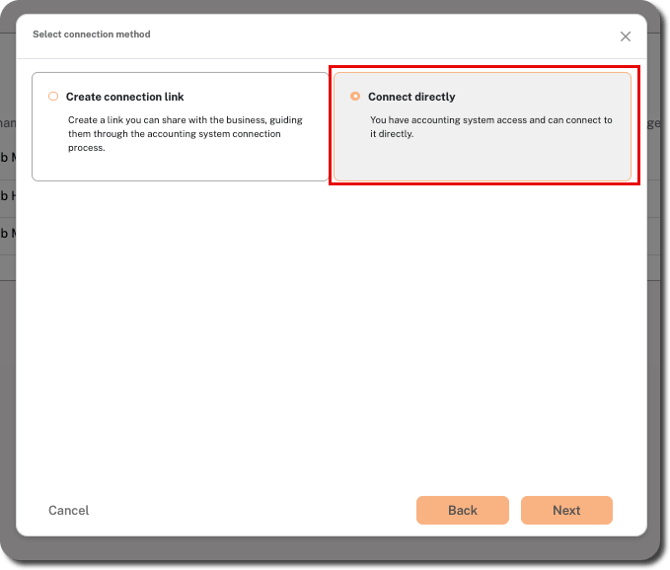
4. Choose your collection parameters and click Next.
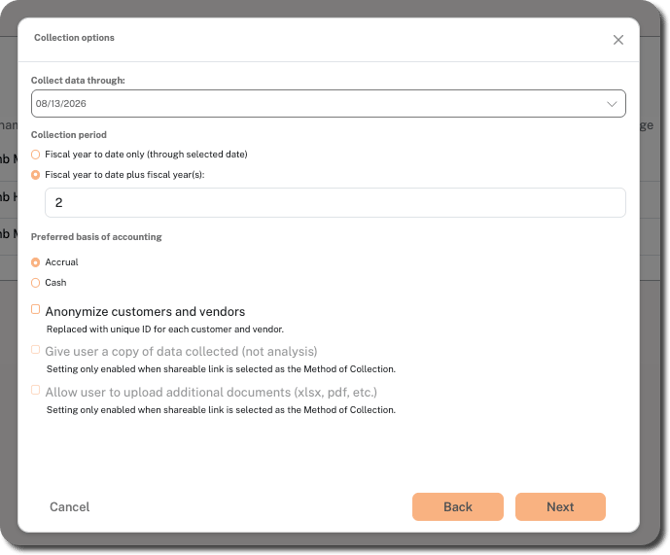
- Collect data through: Defaults to the current date, but you can click on the arrow at the far-right of the field to choose a previous month, day, and year. Use this to specify the end of the period for your collected data.
- Collection period: Defaults to collect the fiscal year to date plus 2 more fiscal years. Use the up/down arrows at the far-right of the field to change the number of additional fiscal years, or choose the Fiscal year to date only option, if applicable.
- Basis of accounting: Choose between Accrual (default) or Cash. For QuickBooks connections, we do not recommend using cash unless you know QuickBooksis configured to support it.
- Anonymize customers and vendors: If you prefer to anonymize your customer and vendor data, select this option.
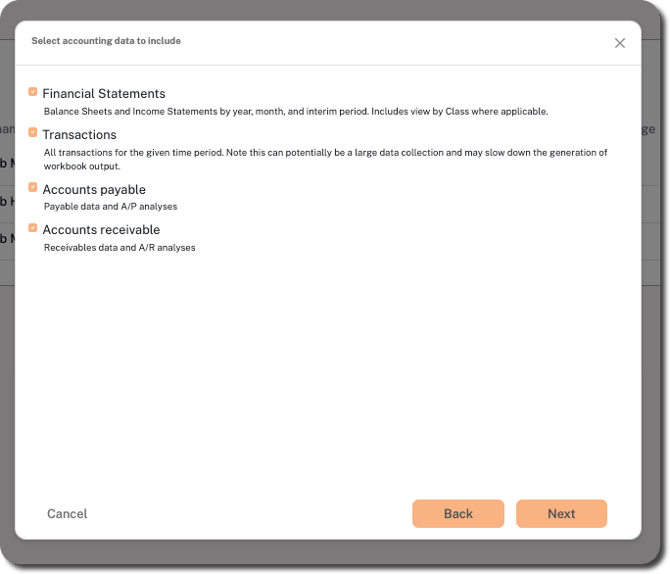
5. Confirm and/or update the types of data you want to include in your collection (i.e., Financial Statements, Transactions, Accounts Payable, and Accounts Receivable). All options are selected by default.
💡 TIP
You can choose to include or not include financial statements and/or transactions, especially if the company you are connecting to has a large volume of data that may slow down workbook production.
6. Click Next.
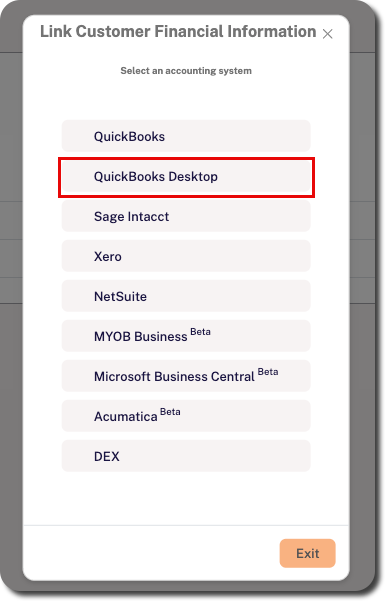
7. Select QuickBooks Desktop.
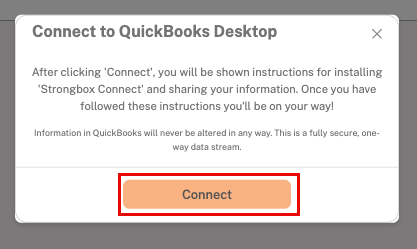
8. Click Connect to launch the Connect to QuickBooks Desktop guide.
9. Click Get Strongbox Connect to download and install the application.
- Crunchafi/Strongbox Connect only needs to be installed once. You'll be notified if an upgrade is available. If you have already installed the latest version, skip to Step 10.
- If QuickBooks is open, close it before opening the install file.
- Find the file that was downloaded and open it in order to install the latest version.
- For Chrome or Microsoft Edge, click Allow if prompted to confirm that you want to allow Crunchafi Data Extraction to access the QuickBooks Desktop file. This applies if it is your first connection or if a lot of time has passed since the last connection.
10. Open your QuickBooks company file as the admin user after Connect has been installed.
NOTE
You must log in as the admin user in order to approve access needed by Crunchafi/Strongbox Connect and request the necessary reports.
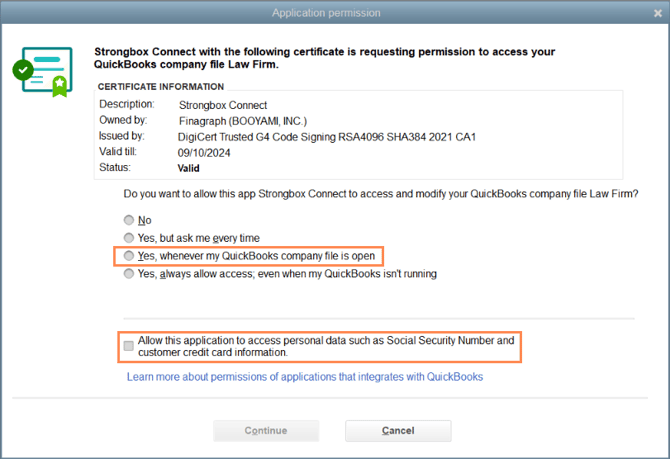
11. Grant access to Crunchafi/Strongbox Connect.
- The first time you open a QuickBooks file as an admin, QuickBooks will prompt you to grant access to Crunchafi/Strongbox Connect.
- Select Yes, whenever this QuickBooks company file is open.
- Select Allow this application to access personal data such as social security numbers and customer credit card information.
NOTES
Social security numbers and credit card numbers are NOT collected. This setting allows you to share high-level payroll information with Crunchafi Data Extraction.
If the QuickBooks - Application Permission window shown below does not appear, confirm that you are logged in as an admin.
12. Click Continue.
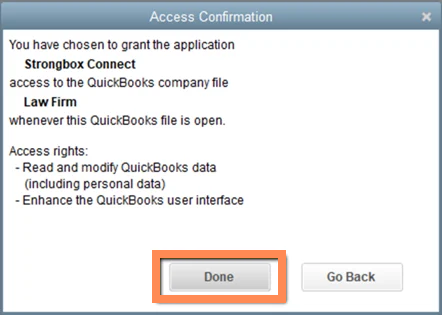
13. Click Done on the Access Confirmation window.
14. Click Continue to confirm.
15. Keep the QuickBooks file open and return to the Connect to QuickBooks Desktop guide window to click the Connect to Crunchafi/Strongbox button.
Next Steps
When the connection starts, you will see a progress chart appear in the lower-right corner of your screen.
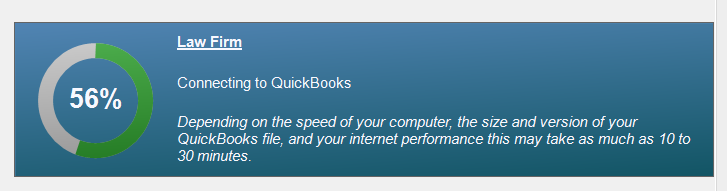
The workspace list in Crunchafi Data Extraction will also show that the import is in progress.

Once completed, you will see a success message, which links to the appropriate colleciton details page where you can download the completed workbook(s).
