
⚠️ NOTE
There may be fees associated with setting up a new data connection. Contact your account team to confirm pricing.
Pre-Implementation
You must have administrator permissions in ServiceTitan to set up the connection in BUCS.
Configuration Steps in ServiceTitan
This section covers the following steps that must be taken from ServiceTitan before moving forward with connection in the BUCS platform:
Create a BUCS Analytics User in ServiceTitan
Create a new BUCS Analytics user and give the user permission to Manage API Access and Generate API Application Key.
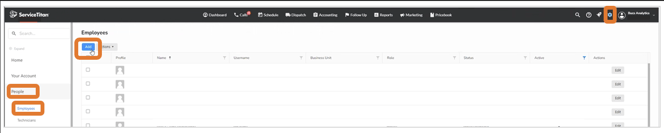
1. Login to your ServiceTitan account and go to Settings > People > Employees > Add.
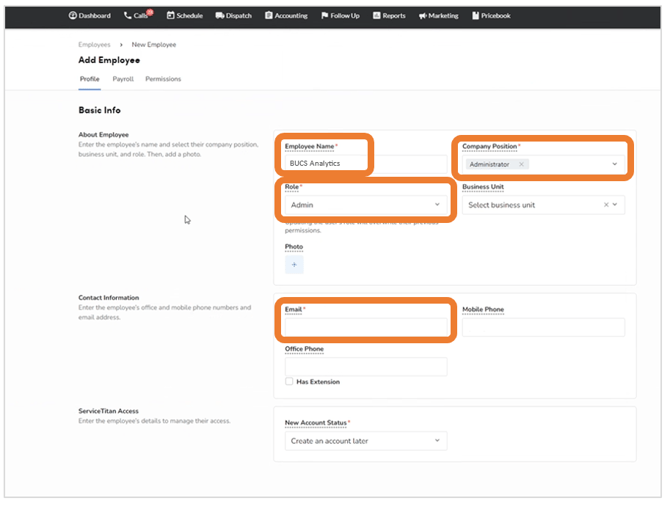
2. Provide the user profile details:
- Employee Name: BUCS Analytics
- Role: Select the appropriate role based on your organizational structure
- Company Position: Select the appropriate position based on your organizational structure
- Email: Use the email address of the person managing the BUCS Analytics data connection
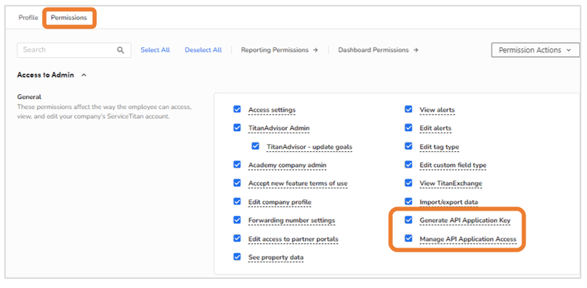
3. Click on the Permissions tab and make sure there is a checkmark in front of Generate API Application Key and Manage API Application Access.
4. Click Save.
Create a BUCS App in ServiceTitan
1. Login to Login to My Apps - ServiceTitan API - developer portal
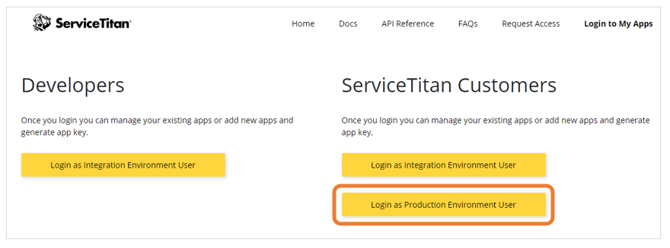
2. Click on Login as Production Environment User.
3. Log in with the BUCS Analytics user you created in the section above.
4. Click +New App

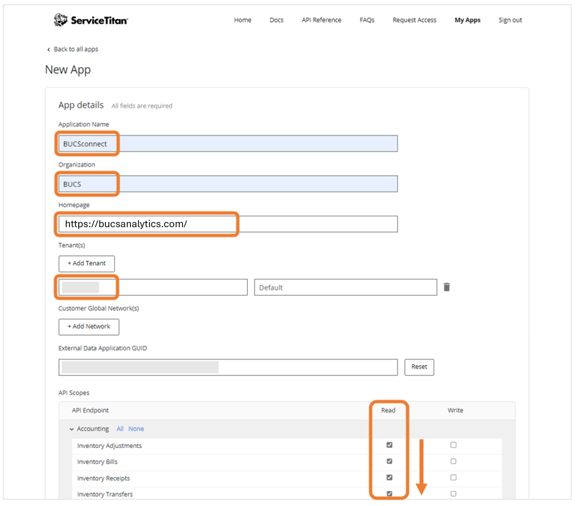
5. Enter the following information in the App details page and then click :
- Application Name: BUCS
- Organization: BUCS
- Homepage: https://bucsanalytics.com/
- Tenant: Input your Tenant ID(s) here (see note below)
- Customer Global Network(s): Ignore
- External Data Application GUID: Ignore
- API Scopes: Check Read for every box
🗒️ NOTE
If your ServiceTitan account only has one tenant, it should appear in this field by default. If you manage more than one ServiceTitan tenant, you can add all the tenants here. You can also rename or assign nicknames to the tenants from here.
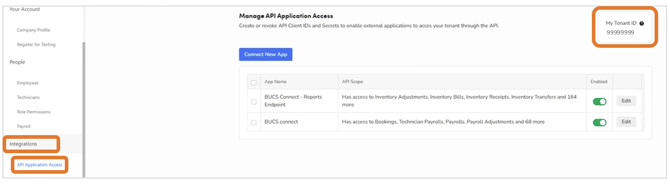
You find your Tenant ID by logging into ServiceTitan and going to Integrations > API Application Access and locating your Tenant ID in the top-right corner.
Saving the app will redirect you to the ServiceTitan My Apps page.
Connect the BUCS App in ServiceTitan
Connect the BUCS App you just created to your ServiceTitan account so BUCS can access your ServiceTitan data.
🗒️ NOTE
If setting up connections for multiple tenants, you will need to complete the steps below for each individual tenant.
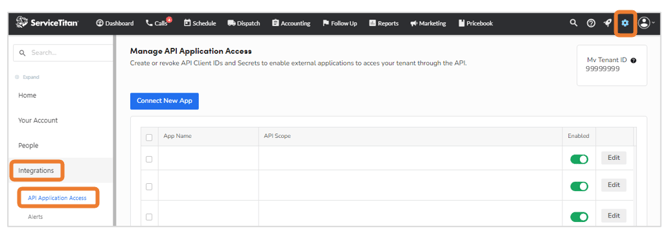
1. Log into your ServiceTitan account and go to Settings > Integrations > Application Access.
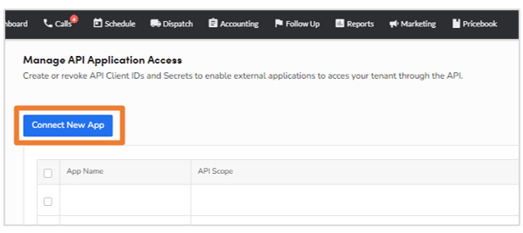
2. Click Connect New App.
3. Select the BUCS app you just created per the instructions above and click Connect.

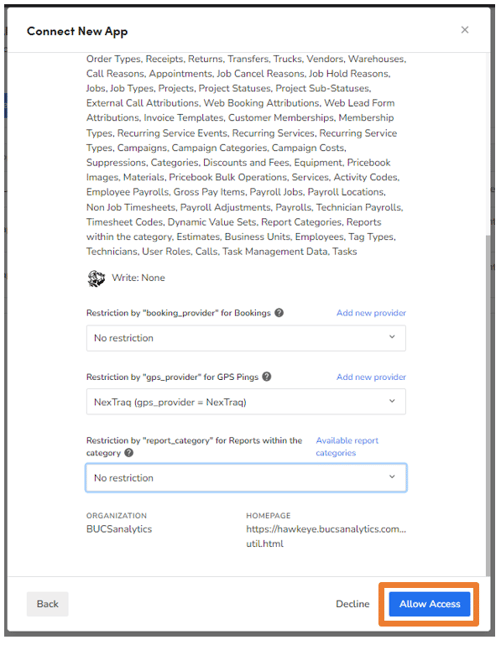
4. On the next screen, select No restriction for the Booking Restrictions field, select NexTraq (or retain the default selection) for the GPS Pings field, and select No restriction for the Reports Category field.
5. Click Allow Access. A green banner indicating the app was connected will appear.
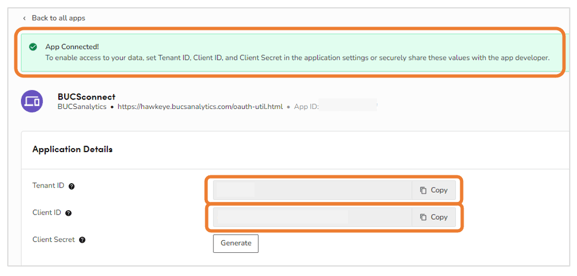
8. Click Generate next to the Client Secret field to generate, view, and copy the Client Secret.

❗IMPORTANT
Under the Application Details section, copy and retain the values for Tenant ID, Client ID, and Client Secret. This information is required to complete your data connection from the BUCS Connection wizard in the next section.
Implementation Steps in BUCS
🗒️ NOTE
If setting up connections for multiple tenants, you will need to complete the steps below for each individual tenant.
1. Go to Customer Portal > Connection Management > Connection Hub.
2. Locate or search for the ServiceTitan connector and click Connect.
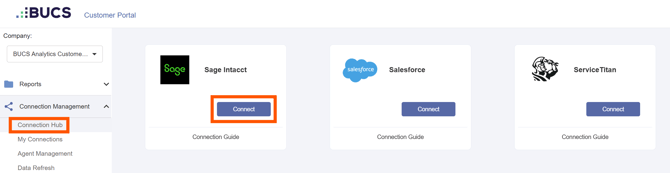
3. Enter a name for your connection and click Next. The connection name should be descriptive and specific to the connection. 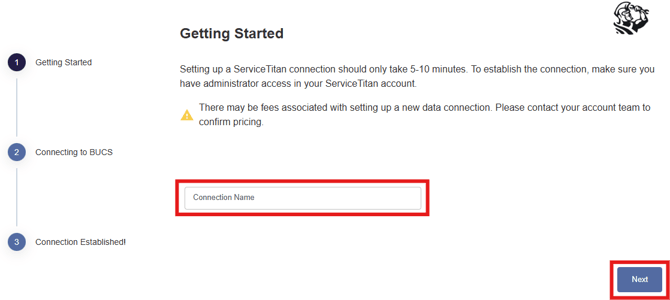 4. Enter your ServiceTitan Tenant ID, Client ID and Client Secret you had copied and retained in the steps above and then click Save.
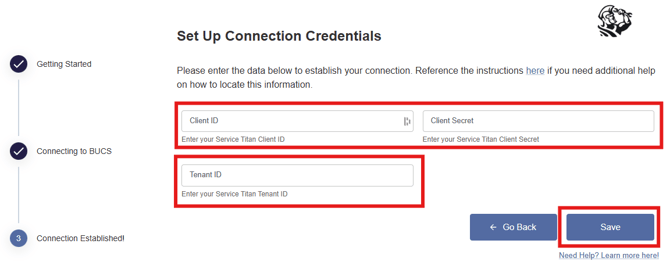
A Connection Established message will appear if the connection was successful and data from Acumatica will continuously sync to BUCS. If the connection was not successful, you will be prompted to try again.
🗒️ NOTE
It may take up to 24 hours for ServiceTitan data to appear in the BUCS platform.