
⚠️ NOTE
There may be fees associated with setting up a new data connection. Contact your account team to confirm pricing.
Pre-Implementation
You must have full administrator access in NetSuite, including the ability to set up users and role permissions, to establish the connection with BUCS.
Configuration Steps in NetSuite
This section covers the following steps that must be taken from NetSuite before moving forward with connection in the BUCS platform:
- Create a New Role in NetSuite
- Create a BUCS Analytics Employee in NetSuite
- Create an Integration
- Create a Token
- Enable REST Web Services
Create a New Role in NetSuite
Create a new role for the BUCS Analytics user with list and view permissions to all modules in NetSuite.
1. Go to Setup > Users/Roles > Manage Roles > New.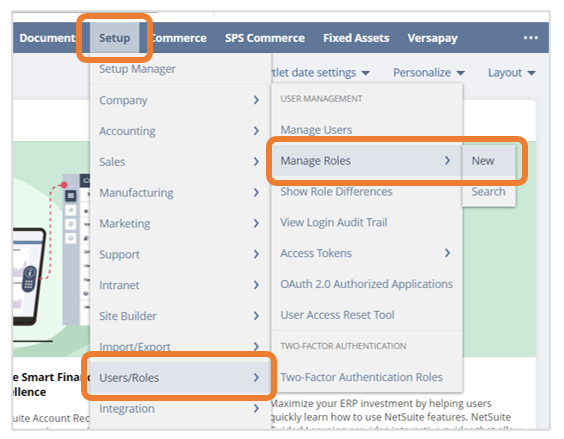


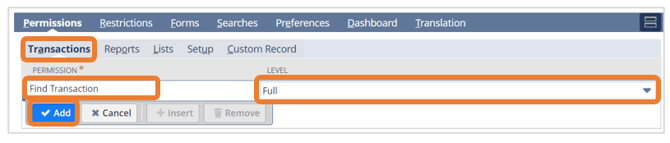
4. Go to the Transactions tab under Permissions. Select Find Transaction from the dropdown menu, change Level to Full and click Add. You may need to work with the BUCS team and provide additional permissions depending on the datasets you want to integrate.
5. Go to the Reports tab under Permissions and confirm the SuiteAnalytics Workbook level is set to Edit.

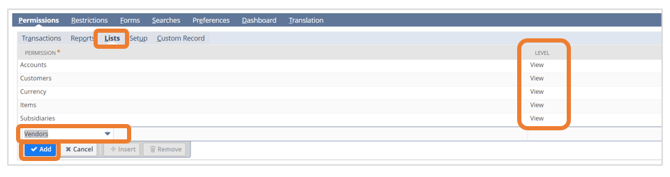
6. Go to the Lists tab under Permissions and click Add after selecting each of the following from the dropdown and changing the Level to Full: Accounts, Classes, Currency, Customers, Employee Record, Employees, Items, Locations, Subsidiaries (if applicable), and Vendors.
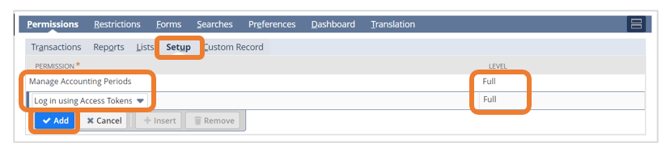
7. Go to the Setup tab under Permissions and click Add after selecting each of the following from the dropdown and changing the Level to Full: Access Token Management, Accounting Lists, Custom Body Fields, Custom Columns Fields, Custom Entity Fields, Custom Event Fields, Custom Fields, Custom Items Fields, Custom Item Number Fields, Custom Lists, Custom Record Types, Custom Transaction Fields, Deleted Records, Log in using Access Tokens, Manage Accounting Periods, Other Custom Fields, REST Web Services, SOAP Web Services, Records Catalog, SOAP Web Services, Set Up Company, User Access Tokens.
8. Click Save to create the BUCS Analytics role.
Create a BUCS Analytics Employee in NetSuite
Create the employee and give them access to the BUCS Analytics role you created per the instructions in the section above.
1. Go to Lists > Employees > Employees > New.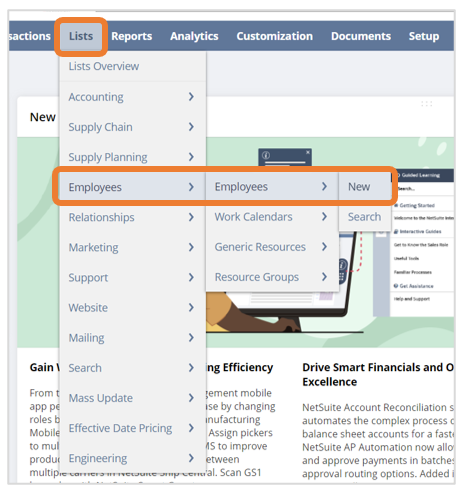
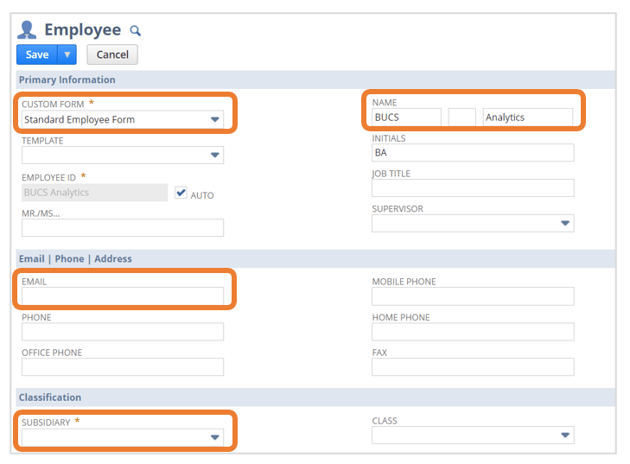
2. Enter the following user details:
- Custom Form: Enter Standard Employee Form
- Name: Enter BUCS Analytics
- Email Address: Enter the email address of the person managing the BUCS Analytics data connection
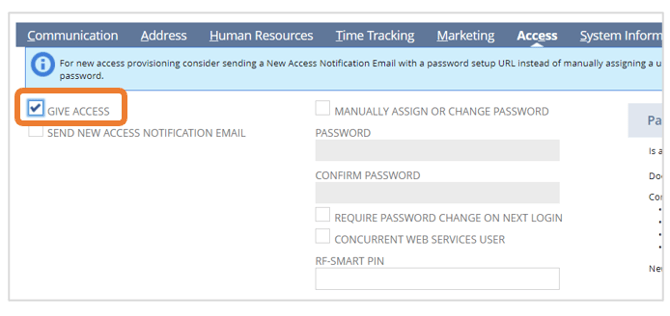
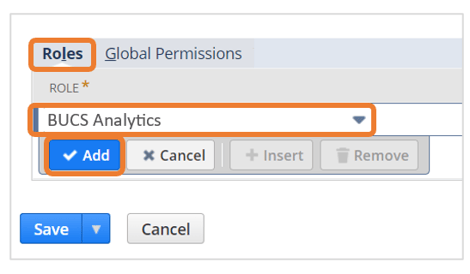
6. Click Save to create the BUCS Analytics employee.
Create an Integration
1. Go to Setup > Integrations > Manage Integrations > New.
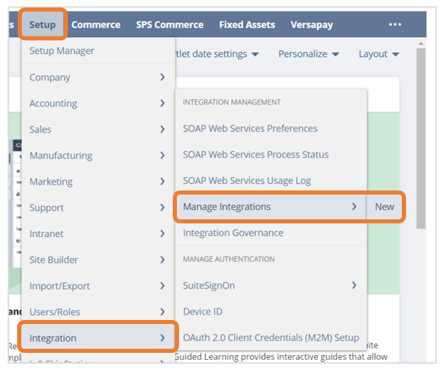
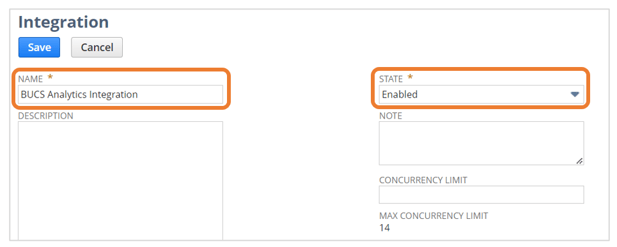
2. Enter BUCS Analytics Integration for the name and confirm the State is set to Enabled.
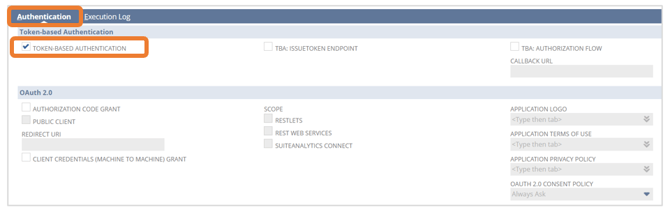
4. Click Save.
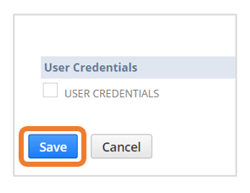
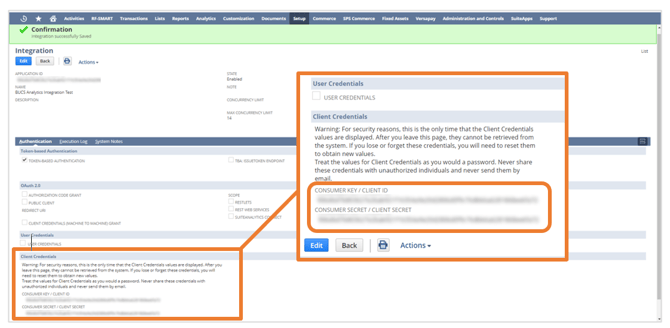
The Consumer Key and Consumer Secret will appear at the bottom of the page. Copy and retain both of these values before leaving the page. They will be required in the BUCS Connection Wizard per the instructions in the section below,
⚠️ IMPORTANT
These credentials will not be displayed after leaving the page. If you lose or forget the credentials, you will need to generate a new ones.
Create an Access Token
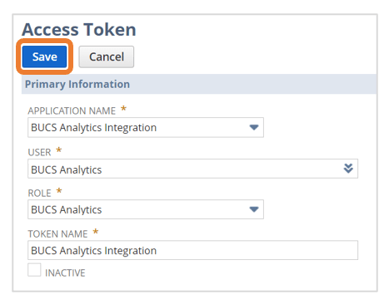
1. Go to Setup > Users/Roles > Access Tokens > New.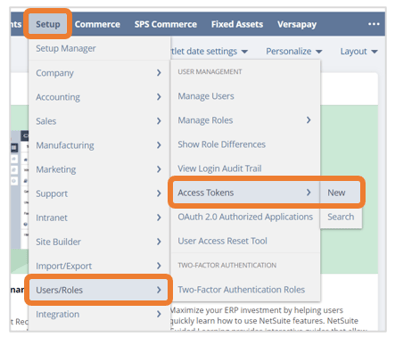
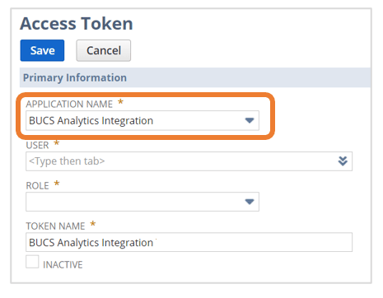
2. Select the BUCS Analytics Integration you created from the Application Name dropdown. If you skipped this step, return to the section above for instructions.
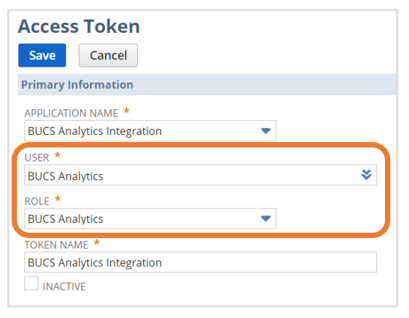
3. Select the BUCS Analytics employee you created from User dropdown and BUCS Analytics from the Role field. These are the user and role you created previously.
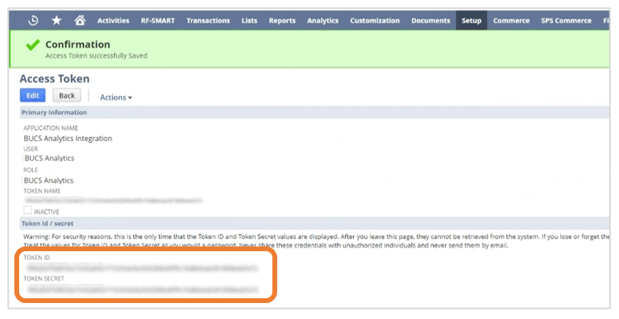
The Token ID and Token Secret will appear at the bottom fo the page. Copy and retain these values before leaving the page. They will be required when using the BUCS Connection Wizard for setup in the section below.
⚠️ IMPORTANT
These values will not be displayed after leaving the page. If you lose or forget these values, you will have to generate new ones.
Enable Rest Web Services
1. Go to Setup > Company > Enabled Features.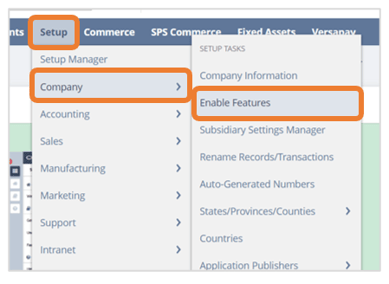
2. Go to the Analytics tab and confirm the KPI SCORECARDS and SUITEANALYTICS WORKBOOK boxes are selected. 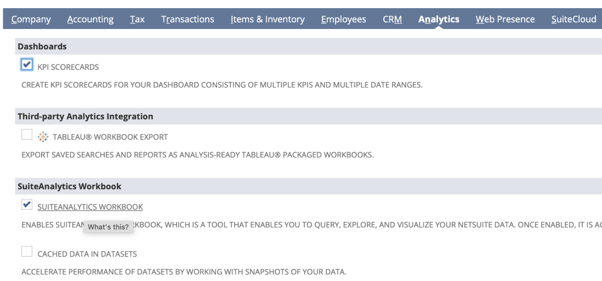
3. Click on the SuiteCloud tab.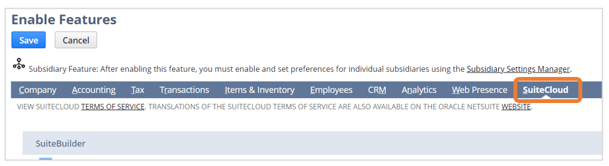
4. Scroll down to the SuiteTalk (Web Services) section and confirm the REST WEB SERVICES box is selected.
Implementation Steps in BUCS
1. Go to BUCS Customer Portal > Connection Management > Connection Hub.
2. Locate or search for the NetSuite connector and click Connect.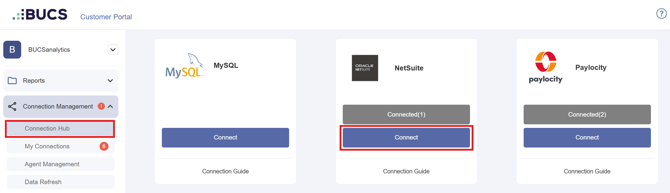
3. Enter a name for your connection and click Next. The connection name should be descriptive and specific to the connection. 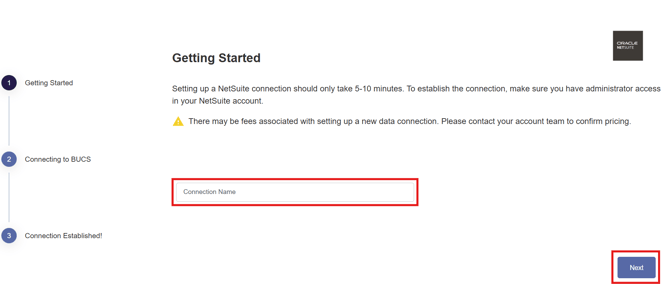
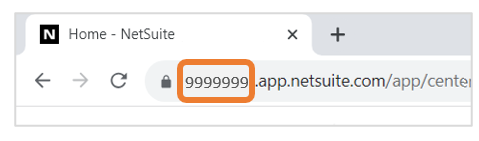
4. Enter the Consumer Key, Consumer Secret, Token ID, and Token Secret values you copied from the previous configuration steps and enter your NetSuite Account ID. If you skipped these steps, go back to the Integration and Access Token sections.
💡 TIP
You can find your NetSuite Account ID by logging into NetSuite and viewing the numeric code at the beginning of the URL.
5. Click Save. 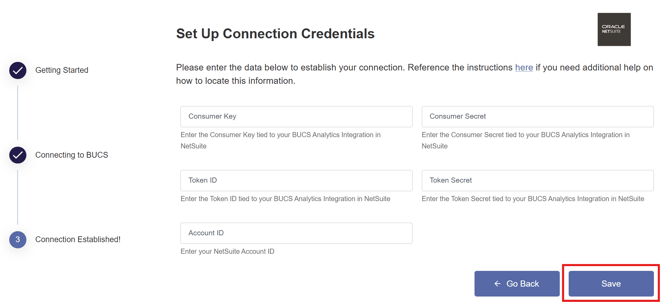
A Connection Established message will appear if the connection was successful and data from NetSuite will continuously sync to BUCS. If the connection was not successful, you will be prompted to try again.
🗒️ NOTE
It may take up to 24 hours for NetSuite data to appear in the BUCS platform.