
Requirements
-
You must be an admin in Sage Intacct to create a Web Services user.
-
The Web Services user must have specific read-only access.
- Setup differs depending on whether your company uses:
- User-based permissions (follow the steps below)
- Role-based permissions (click here for instructions)
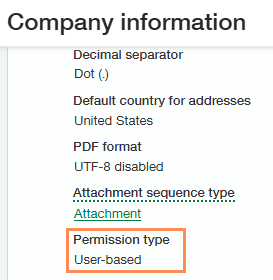
To confirm you have user-based security, take the following steps:
1. Go to Company > Setup (tab) > Company > General Information.
2. Scroll down to the Global settings section and confirm Permission type = User-based.
Enable Web Services
1. Go to Applications > Company > Admin (tab) > Subscriptions.
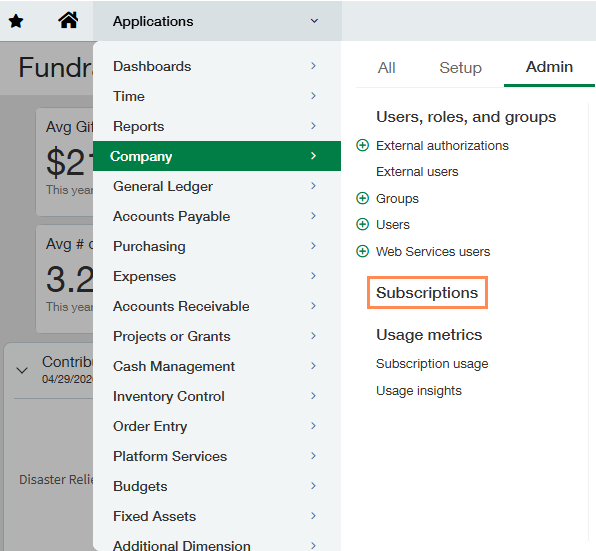
2. Scroll down to the Web Services subscription and turn the toggle on.

NOTE
No additional changes will be incurred.
Update Web Service Authorizations
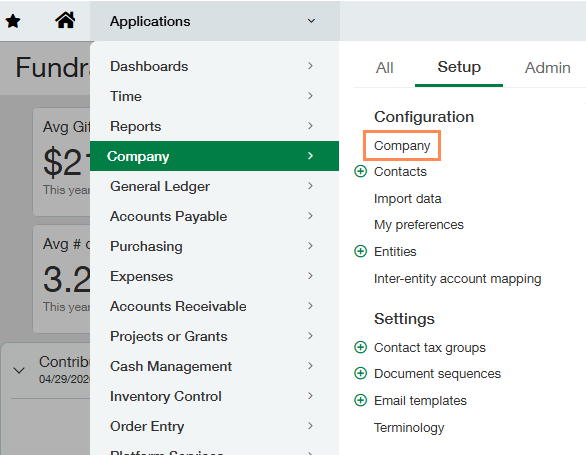
1. Go to Company > Setup (tab) > Company.
2. Click the Edit button in the top-right corner.
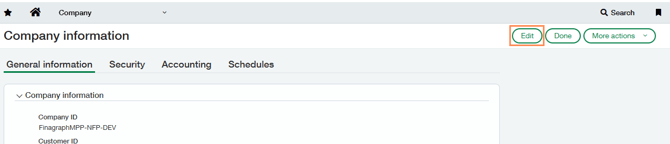
3. Go to the Security tab.
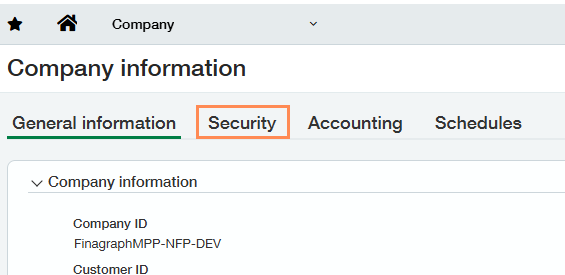
4. Scroll down to Web Services Authorization and then click the Add button.

5. Enter the following information:
- Sender ID: Finagraph (must be capitalized)
- Status: Active
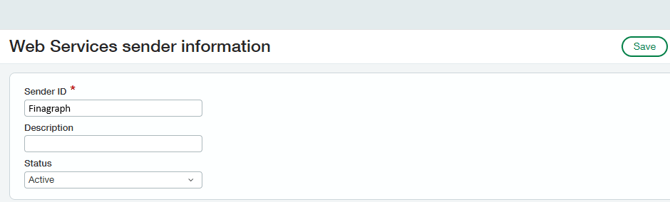
6. Click Save and then click Save again in the top-right corner.
Create a Contact
1. Go to Company > Setup (tab) > Contact.
2. Click Add in the top-right corner.
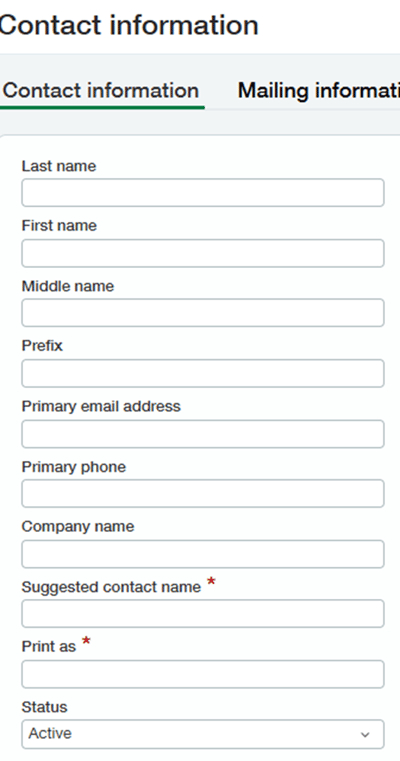
3. Fill in the following information and click Save:
- Last Name: N/A
- First Name: N/A
- Primary Email: Enter the email of the person who will be receiving the Web Services login (must be a valid email address)
- Suggested contact name: Finagraph (must be capitalized)
- Print As: Finagraph (must be capitalized)
- Status: Active
Create a Web Services User
NOTE
If you have a multi-entity shared environment enabled, make sure to add the Web Services User at the Top Level.
1. Go to Company > Admin (tab) > Web Services users.
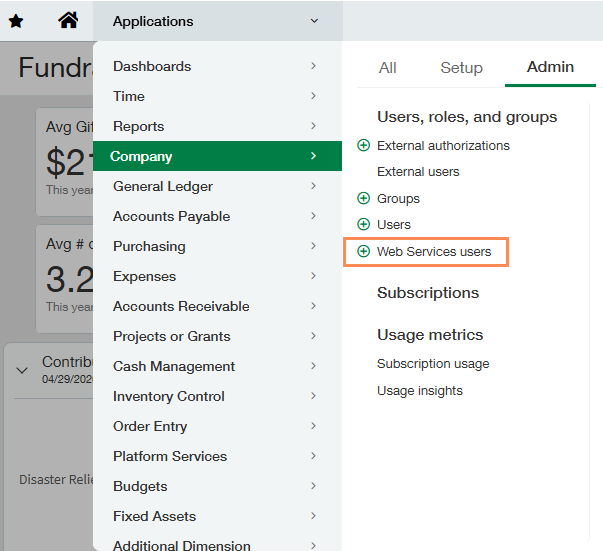
2. Click the Add button.
3. Enter/select the following information:
- User ID: Finagraph (must be capitalized); this is the Web Services User ID for login
- Account email address: Enter the email address of the person who will be receiving the Web Services login (must be a valid email address)
- A new password will be email to this address and is required to sign in
- Status: Active
- Contact Name: Finagraph
- User Type: Business
- Admin Privileges: Limited
4. Click Save in the top-right corner.
5. Click OK if prompted about additional charges (no additional charges will be incurred).
6. In the pop-up window, enter your admin password and click Done.
Grant Permissions to the Web Services User
Depending on your Sage Intacct settings, some of the following permissions may not appear and do not need to be configured.
From Company > Admin (tab) > Web Services Users:
1. Click on the Subscriptions link for the Finagraph user.
2. Click Permissions next to Administration, do the following (where applicable), and then click Save:
- Select List next to Application Subscriptions
- Select View next to Company Info
3. Click Permissions next to Company, do the following (where applicable), and then click Save:
-
Select Read Only at the top
4. Click Permissions next to General Ledger, do the following (where applicable), and then click Save:
- Select Read Only at the top
- Select View next to User-defined books
5. Click Permission next to Accounts Payable, do the following (where applicable), and then click Save:
- Select Read Only at the top
- Select View next to Payment Requests
6. Click Permissions next to Accounts Receivable, do the following (where applicable), and then click Save:
- Select Read Only at the top
- Select View next to Manage Payments
- Select View next to Manage Books
8. Click the Save button in the top-right corner.
Check Your Email for Credentials
Check your email for the credentials allocated to the Web Services User created above. These credentials can be used to connect your Sage Intacct company to Crunchafi Data Extraction. 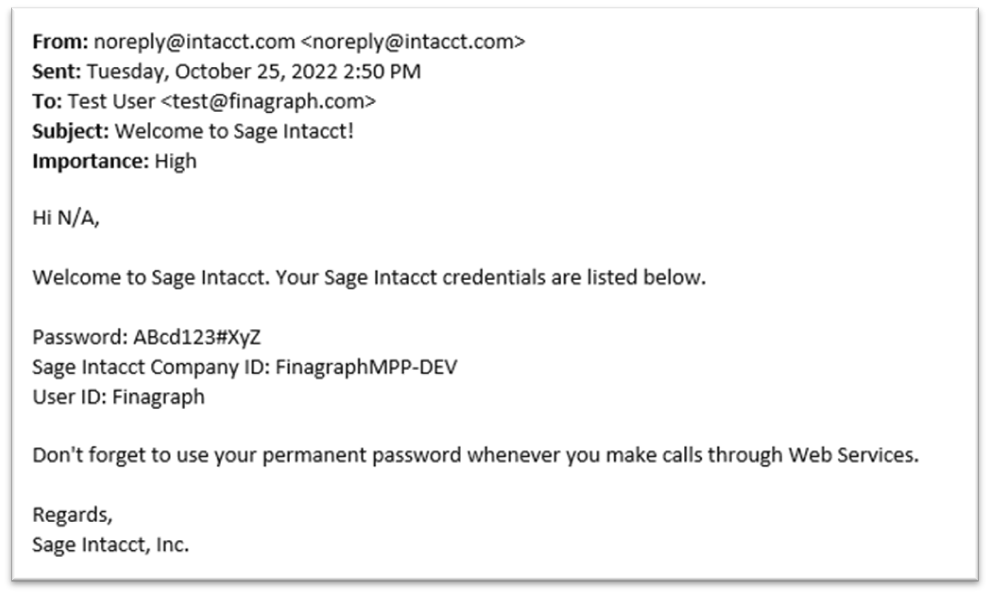
Connect with Crunchafi Data Extraction
You are ready to connect your Sage Intacct company with Crunchafi Data Extraction using the Web Services User login credentials. Follow our step-by-step guide here.